Upcycle Old Crayons With This Fun and Easy Star Wars DIY
Making lemons into lemonade is a parents best trick, taking something ordinary and mixing it up to create something new and better. This is like that, a back-pocket project that uses items you have laying around the house to make something new and fun. Plus it’s easy peasy, so keep this one around for rainy days or afternoons when you’ve heard “I’m bored” one too many times.
What really takes home the cake here is that this craft uses up old crayons. So get those bags, bins and containers of broken, cracked and worn down to the last tip crayons, and rejoice in the fact that you’re giving them a new life (and cleaning out clutter in the process!).
Kids of all ages will get excited by this activity. They love to see the transformation from old to new, and they get cool multicolored crayons that they made themselves!
Ready to make some brand new crayons?! Great, let’s get to work!
What You Need:
Crayons
Heavy Duty Resealable Bad
Rolling Pin
Ovenproof flexible molds/ice cube trays
Cookie sheet
Directions:
Step 1:
Preheat the oven to 200 degrees F. Have the kids peel off and remove any paper wrappers from the crayons you’re using.
Step 2:
Put the crayons in a resealable bag, making sure to press out any air and close tightly. Hit gently with a rolling pin to break the crayons into small pieces. The smaller the crayon bits, the quicker they will melt in the oven and the less the colors will bleed into each other, making for a more impressive looking end product.
Step 3:
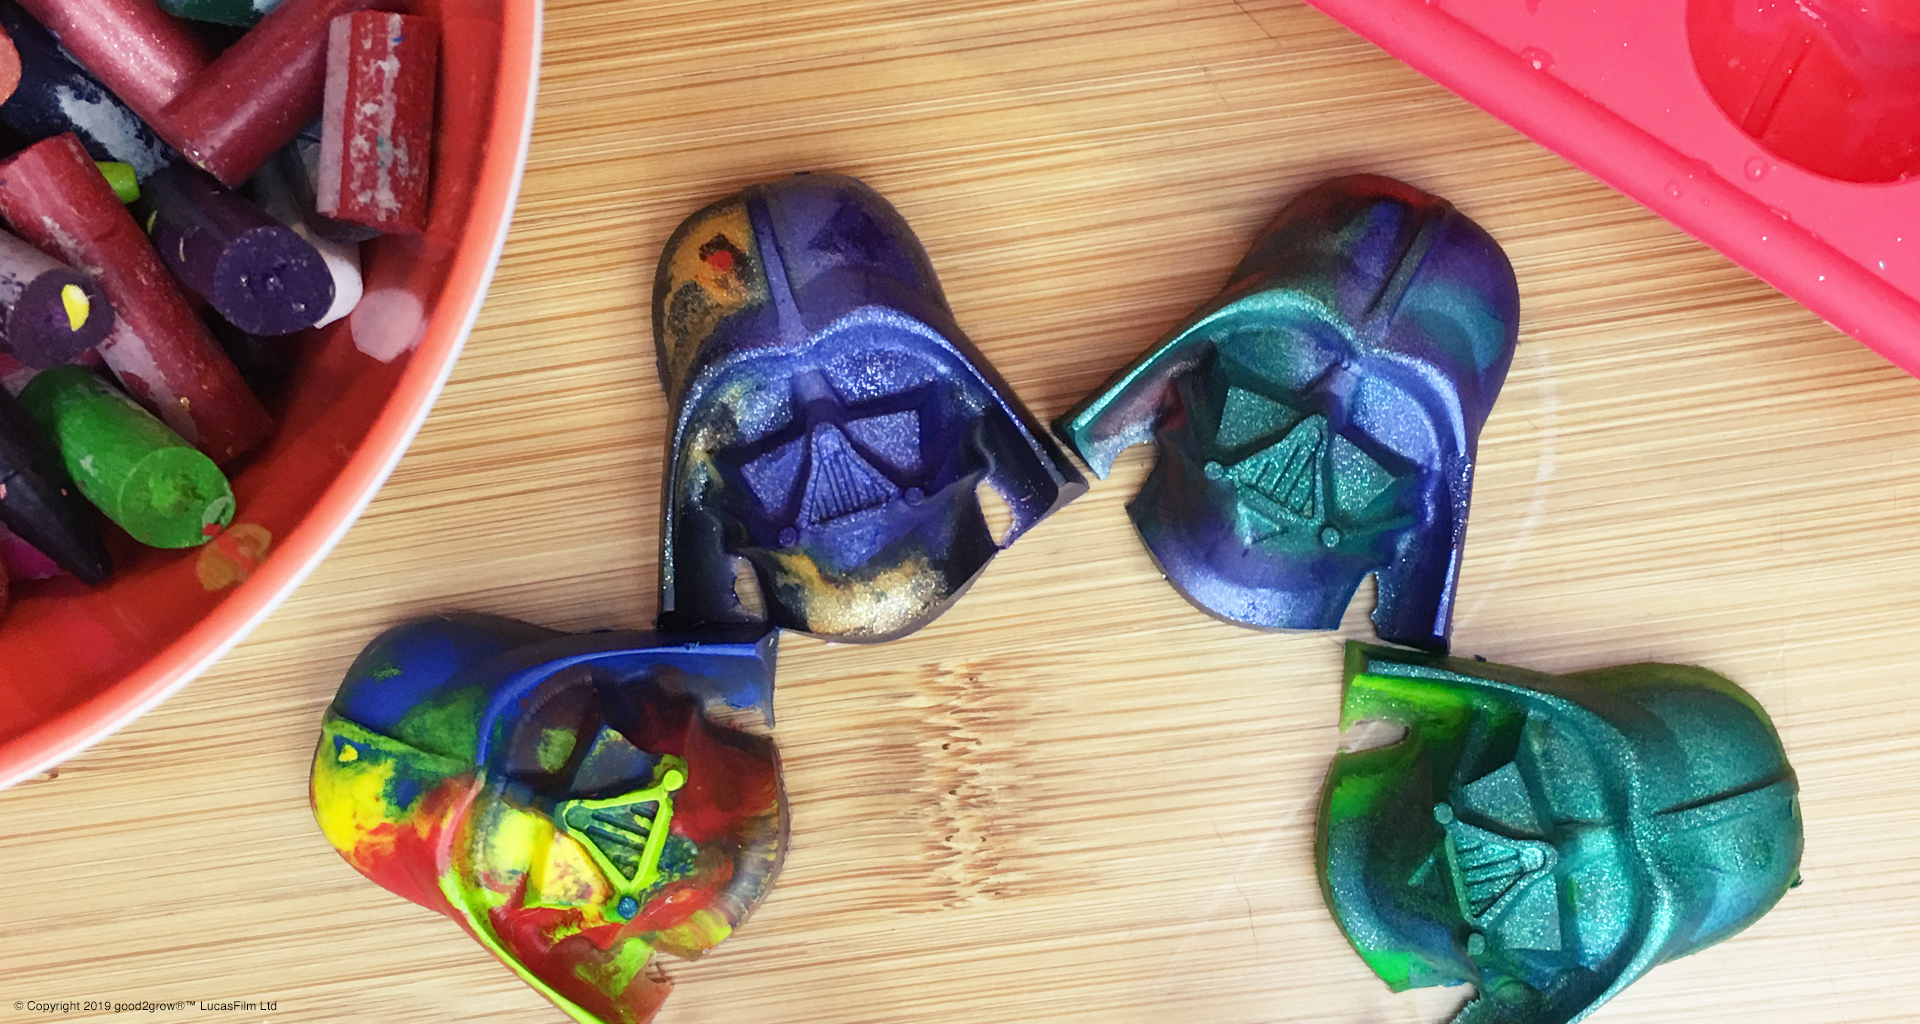
Fill molds with crayons. You can just dump them the crayons in or you can be more precise, grouping similar colors together, or graduating the colors in the molds from dark to light. Take your pick, any way is fun!
You want the molds to be just slightly overfilled, since the crayons will take up less space in the molds when melted. In our galaxy we used Star Wars molds, but any shape or character mold works, choose your favorite!
Step 4:
Place the molds on a cookie sheet and bake in the oven for 10 to 15 minutes or until the crayons are completely melted.
Step 5:
Being very careful, (hot wax is HOT) remove the cookie sheet from the oven, trying not to stir or cause the mold fillings to swish around.
Step 6:
Let the crayons cool and harden. To speed this up, put the molds in the freezer to firm.
Step 7:
The crayons should be cool after about 30 minutes in the freezer.
Feel if the bottom of the molds are cool, if so you should be able to release the crayons by pulling and stretching the molds and then pushing each crayon up and out. If the molds are still warm, return them to the freezer and check again in 10 minutes.
Step 8:
And then Voila! You have your own new and improved crayons, in the shape of your choosing!
Are you running low on good2grow? We’ve got you covered! good2grow Juices are now available on Amazon (click here to buy now).